Tuesday, November 02, 2010

SharePoint 2007 Usage Reports

For the past few weeks I was trying to develop some custom reports to track SharePoint site usage. The built-in reports show only the current statistics. But if someone wants to view old statistics there is no way that person can generate a report.
I started by going through the MOSS object model to find out some method where I can generate these reports easily. Then I found SPWeb.GetUsageData method. But it was giving enough problems and I decided to look for some other mean.
Finally I end up with a happy solution. It was so easy, you just connect to SharePoint shared services database and it has all the tables and views you need to generate the reports.


SharePoint Shared Services database


Available views


All the tables starting with ‘ANL’ contains site usage data.

I simply wrote few queries and developed required reports using SSRS. Or even you can use any reporting tool which is available in the market. Since I used SSRS I simply published it into a SharePoint site.
Following is a sample query I wrote to view the most popular documents in a SharePoint site.

SELECT ANLResource.DocName, COUNT_BIG(*) AS HitCount
FROM ANLResourceHits INNER JOIN
ANLWeb ON ANLResourceHits.WebGuid = ANLWeb.WebGuid INNER JOIN
ANLResource ON ANLResourceHits.ResourceId = ANLResource.ResourceId
WHERE (CHARINDEX(‘.aspx’, ANLResource.DocName) = 0) AND (CHARINDEX(‘.swf’,
ANLResource.DocName) = 0)
GROUP BY ANLResource.DocName
ORDER BY HitCount DESC

article from Kolitha de Silva's blog!

Monday, November 01, 2010

Installing SharePoint Designer 2007 and 2010

Nope, SharePoint designer 2010 is not supporting backward compatibility. It won't support Windows SharePoint Services v3 or earlier versions. The answer is... yes, SharePoint designer 2010 only works for SharePoint 2010. I think this news is hard for all of us, but this will bring some good times as well.

Because in this way, MS will build very good version of product without carrying any historical "sins" along. By taking this as the advantage they will only concentrate on the SharePoint 2010 support and will make really a very good product. So, how to get the support for SharePoint 2007 sites? Is there no other way to edit the earlier version sites? I know this is the question in your mind now.
 
Don't fear. There is an option. By thinking these questions in mind, the SharePoint designer team is developing the software/product to install the designer side by side. So, you can install the SharePoint designer side by side the both versions on the same machine without having any issues. So, this will solve all the problems. If any site which is of earlier than SharePoint 2010 you can use SharePoint Designer 2007, for SharePoint 2010 you can use SharePoint designer 2010.

Are there any requirements for side by side installation? Yes, it has some requirements. You know a big change from previous version to current version is bit [32 bit vs 64 bit]. As SharePoint Designer 2007 is came only on 32-bit[x86], you will only install SharePoint Designer 2010[X86] 32 bit version side by side on a server. And if you install SharePoint Designer 64-bit on a server which has installed 32-bit MS Office, then it won’t give good result. More about 32bit vs 64bit architecture decisions in office 2010 can be read at http://blogs.technet.com/b/office2010/archive/2010/02/23/understanding-64-bit-office.aspx.

So, pay attention whilst installing the SPD and install everything of same version only.

Tuesday, October 26, 2010

SharePoint 2010 - Performance and capacity management

Hi guys,

a real timesaver when you re planning (and operating) a new SharePOint 2010 environment. If everyone would be following these guidelines, I would have 50% less work in terms of SharePoint trouble-shooting as a Lead SharePoint Architect/ Consultant...

SOURCE: Technet (link) - Performance and capacity planning is the process of mapping your solution design for Microsoft SharePoint Server 2010 to a farm size and set of hardware that will support your business goals.


The articles in this section include:
Capacity management and sizing for SharePoint Server 2010
This article walks you through the process of determining the hardware requirements for a single farm, and provides an overview of the planning process.

SharePoint Server 2010 capacity management: Software boundaries and limits
This article provides a starting point for planning the performance and capacity of your system. This article includes performance and capacity testing results and guidelines for acceptable performance.

Performance and capacity technical case studies (SharePoint Server 2010)
This article provides links to key technical case study articles that contain performance and capacity details for specific environments running SharePoint Server 2010.

Performance and capacity test results and recommendations (SharePoint Server 2010)
This article provides links to articles that provide test results and recommendations for specific feature sets in SharePoint Server 2010.

Storage and SQL Server capacity planning and configuration (SharePoint Server 2010)
This article describes a process for planning storage and SQL Server capacity for a SharePoint Server 2010 deployment.


The following resources can also be helpful for capacity planning:

Hardware and software requirements (SharePoint Server 2010)

Technical diagrams:
- Topologies for SharePoint Server 2010
- Search Architectures for Microsoft SharePoint Server 2010
- Design Search Architectures for Microsoft SharePoint Server 2010
- Search Environment Planning for Microsoft SharePoint Server 2010


To download these models, see Technical diagrams (SharePoint Server 2010).

Thursday, October 21, 2010

SharePoint version table

SharePoint 2010

This table shows the version and build numbers for SPF 2010.
Build Number Version String
4514 Beta 2
4730 RC1
4755 RTM / official release
5114 Hotfix Update June 2010
5123 Cumulative Update August 2010

Latest Version: RTM (SPF); CU August 2010 (SPF, SPS, SPS /w PS)
Note: All updates are standalone. There is no need for installing SPF before SPS or SPS with Project Server.

SharePoint 2007

This table shows the version and build numbers for WSS 3.0 and MOSS 2007.
The version of the current installation can easily be looked up in the Central Administration: Operations > Topology and Services > Servers in farm.
Build Number Version String
4518 RTM / first release
6219 Service Pack 1
6318 Infrastructure Update
6327 Cumulative Update October 2008
6335 Cumulative Update December 2008
6341 Cumulative Update February 2009
6421 Service Pack 2
6504 Cumulative Update April 2009
6510 Cumulative Update June 2009
6520 Cumulative Update October 2009
6524 Cumulative Update December 2009
6529 Cumulative Update February 2010
6535 Cumulative Update April 2010
6539 Cumulative Update Juni 2010
6545 Cumulative Update August 2010
Latest Version: Service Pack 2 (English, German); CU August 2010 (WSS, MOSS)
Note: Install WSS update before updating MOSS

Friday, October 08, 2010

Sharepoint 2010, Project Server 2010, Office 2010 - Information Worker Demonstration and Evaluation Virtual Machine (RTM)

What else could you wish for than pre-installed & pre-populated testing environment?

Well, a set of registration keys unfortunately... latter is something you will have to provide by yourself, but Microsoft took care of our endless installation hours by providing us SharePoint 2010, Office 2010, and Project Server 2010 preinstalled machine with separate AD virtual machine.

Simply login to the Virtual Machines using the Virtual Machine Console as the following user:


•User: administrator
•Password: pass@word1
•Domain: CONTOSO


PLEASE NOTE:
The Virtual Machines contained in this package are 180 day evaluations.
Here is what MS Download service offers you (accessed Sep-2010):

Link to MS page is http://bit.ly/SharePoint2010_Virtual-Machine

--------------------------------------------------------------------------------
2010 Information Worker Demonstration and Evaluation Virtual Machine (RTM) Brief Description

--------------------------------------------------------------------------------

This download contains a two Windows Server 2008 R2 Hyper-V Virtual Machine set for evaluating and demonstrating Office 2010, SharePoint 2010 and Project Server 2010.

On this page


--------------------------------------------------------------------------------


Quick Details

Overview

System Requirements

Instructions Files in this Download


--------------------------------------------------------------------------------

File Name:
Size:
Download files below
2010-7 External\2010-7b.part01.exe
700.0MB
2010-7 External\2010-7b.part02.rar
700.0MB
2010-7 External\2010-7b.part03.rar
700.0MB
2010-7 External\2010-7b.part04.rar
700.0MB
2010-7 External\2010-7b.part05.rar
534.5MB
2010-7 External\2010-7b.sfv
1KB
2010-7 External\Virtual Machine Setup Guide.docx
248KB
2010-7a.part01.exe
700.0MB
2010-7a.part02.rar
700.0MB
2010-7a.part03.rar
700.0MB
2010-7a.part04.rar
700.0MB
2010-7a.part05.rar
700.0MB
2010-7a.part06.rar
700.0MB
2010-7a.part07.rar
700.0MB
2010-7a.part08.rar
700.0MB
2010-7a.part09.rar
700.0MB
2010-7a.part10.rar
700.0MB
2010-7a.part11.rar
700.0MB
2010-7a.part12.rar
700.0MB
2010-7a.part13.rar
700.0MB
2010-7a.part14.rar
700.0MB
2010-7a.part15.rar
700.0MB
2010-7a.part16.rar
700.0MB
2010-7a.part17.rar
700.0MB
2010-7a.part18.rar
700.0MB
2010-7a.part19.rar
700.0MB
2010-7a.part20.rar
681.0MB
2010-7a.sfv
1KB

Quick Details


Version:
TBD
Date Published:
6/16/2010
Language:
English


--------------------------------------------------------------------------------


Version:TBDDate Published:6/16/2010Language:EnglishOverview


--------------------------------------------------------------------------------


Virtual machine “a” contains the following pre-configured software:


1.Windows Server 2008 R2 Standard Evaluation Edition x64, running as an Active Directory Domain Controller for the “CONTOSO.COM” domain with DNS and WINS

2.Microsoft SQL Server 2008 R2 Enterprise Edition with Analysis, Notification, and Reporting Services

3.Microsoft Office Communication Server 2007 R2

4.Microsoft Visual Studio 2010

5.Microsoft SharePoint Server 2010 Enterprise Edition

6.Microsoft Office Web Applications

7.Microsoft FAST Search for SharePoint 2010

8.Microsoft Project Server 2010

9.Microsoft Office Professional Plus 2010

10.Microsoft Visio 2010

11.Microsoft Project 2010

12.Microsoft Office Communicator 2007 R2


Virtual machine “b” contains the following pre-configured software:


1.Windows Server 2008 R2 Standard Evaluation Edition x64, joined to the “CONTOSO.COM” domain

2.Microsoft Exchange Server 2010


Active directory has been preconfigured over 200 “demo” users with metadata in an organizational structure. All of these user profiles have been imported and indexed for search within SharePoint Server 2010.


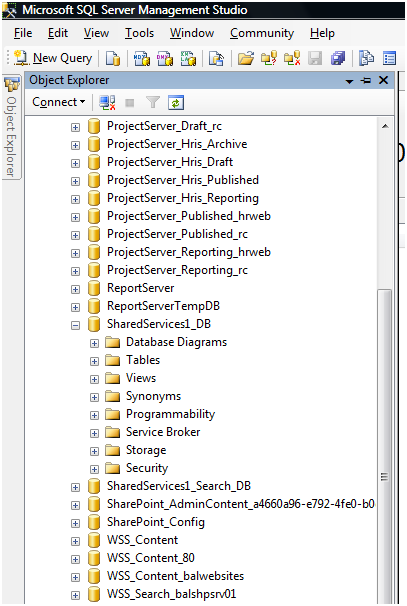
SharePoint Server 2010 has been configured in a “Complete” farm using the default SQL Server 2008 R2 instance. A default site has been created using the Team Site template at http://intranet.contoso.com/ and a FAST Search Center at http://intranet.contoso.com/search/.


As shipped virtual machine “a” requires image “b” for email. Running image "b" is optional.


Akamai Download Manager Links: Please use the following links to download this package using Akamai Download Manager. This allows for pausing and resuming downloads & faster downloads.


•Virtual Machine 2010-7a parts 1-12

•Virtual Machine 2010-7a parts 13-20, SFV & Setup Guide

•Virtual Machine 2010-7b

Top of pageSystem Requirements


--------------------------------------------------------------------------------

•Supported Operating Systems:Windows Server 2008 R2


Additionally you will need:

•Windows Server 2008 R2 with the Hyper-V role enabled.

•Drive Formatting: NTFS

•Processor: Intel VT or AMD-V capable

•RAM: 8 GB or more recommended

•Hard disk space required for install: 50 GB

Top of pageInstructions


--------------------------------------------------------------------------------


Please refer to the included "Virtual Machine Setup Guide.docx" document for full setup instructions.


Download the companion SharePoint 2010 Walkthrough Guide.


Setting up Hyper-V:


1.Install the Hyper-V role on your Windows Server 2008 R2 host (See: TechNet: Hyper-V)

2.Extract the VM images by running the self-extracting executable "2010-7a.part01.exe" and "2010-7b.part01.exe"

3.Open Hyper-V Manager

4.Under Actions, click Virtual Network Manager…

5.Choose New virtual network in the Virtual Networks pane

6.Choose Internal from the type list and click Add

7.Enter a name of Internal and click OK

8.Close the Virtual Network Manager dialog.


Importing the Virtual Machine:


Due to the activation and expiration models in Windows Server 2008 and R2, it’s highly recommended that you do one of the following: Retain a copy of the unaltered VM or, Create and retain a snapshot from before first run of the VMs.


1.In Hyper-V Manager, under Actions, click Import Virtual Machine

2.Use the Browse button to select the folder where the virtual machine package was extracted.

3.Click Import and wait for the Import to complete – the import status will appear in the Operations column

4.Select the newly imported virtual machine and click Settings in the right pane of the Hyper-V Manager

5.Confirm (and correct if necessary) that the Network Adapter is connected to the Internal network from the steps above

6.Close the virtual machine Settings dialog.


Starting the VM:


1.Return to or start the Hyper-V Manager

2.Select the “a” Virtual Machine

3.Click Start

4.Click Connect – a Virtual Machine Connection window should appear

5.Wait for the VM to boot up and reach the login screen.

6.Start the “b” Virtual Machine (optional)

7.Select the “b” Virtual Machine

8.Click Start

9.Click Connect – a Virtual Machine Connection window should appear

10.Log in to the VM Image. (password below). Note: The Virtual Machine Connection uses Ctrl-Alt-Home instead of the normal Ctrl-Alt-Del sequence for login.


Login to the Virtual Machines using the Virtual Machine Console as the following user:


•User: administrator

•Password: pass@word1

•Domain: CONTOSO


Evaluation Period:


The Virtual Machines contained in this package are 180 day evaluations. Additionally they will require activation, or re-arming, after a 10 day period after which they will shut down after 2 hours of continuous operation. To "re-arm" the Virtual Machines use the shortcut provided under Start > All Programs > re-arm > Re-arm Windows (restart required). This will reset the grace period for 10 days. This can be done twice. In order to activate Windows you must add a second network card to each VM in Hyper-V and connect it to the Internet. Once connected you can activate Windows within the Virtual Machine and the VM will run for 180 days.


CRC Checks: Included are two SFV files. These can be used to check the integrity of your download using an SFV checking tool. If you encounter an CRC error while unpacking the VMs please check your download using these SFV files & then re-download the files that were corrupted.

Deployment overview (SharePoint Server 2010)

Updated by MSDN: June 10, 2010
This article contains an overview of a Microsoft SharePoint Server 2010 farm deployment. Although Microsoft SharePoint Server farms vary in complexity and size, a combination of careful planning and a phased deployment that includes ongoing testing and evaluation significantly reduces the risk of unexpected outcomes.

NOTE: For information about site and solution planning, which is not in scope for this article, see Plan for sites and solutions (SharePoint Server 2010).
For a visual representation of the information in this article, see the SharePoint 2010 Products Deployment model in the Technical diagrams (SharePoint Server 2010) topic. Related technical diagrams include "Topologies for SharePoint Server 2010 and Services in SharePoint 2010 Products".
In this article:

Concepts

The logical result of SharePoint Server's flexibility and richness can be a high degree of complexity around installing and configuring SharePoint Server correctly. A fundamental understanding of the following key structural elements in a SharePoint Server environment is required in order to correctly deploy and support SharePoint Server 2010 products:
  • Server farm: The top-level element of a logical architecture design for SharePoint Server.

  • Web application: An IIS Web site that is created and used by SharePoint Server 2010.

  • Content database: Provides storage Web application content. You can separate content into multiple content databases at the site collection level.

  • Site collection: A set of Web sites that have the same owner and share administration settings.

  • Site: One or more related Web pages and other items (such as lists, libraries, and documents) that are hosted inside a site collection.

For more information about these and other architectural components, see Logical architecture components (SharePoint Server 2010).
In addition to understanding the elements of a SharePoint Server environment and how they have to be configured for your solution, you must consider the following additional factors: physical architecture, installation and configuration, and the various stages of deployment.

Physical architecture

The physical architecture, which consists of one or more servers and the network infrastructure, enables you to implement the logical architecture for a SharePoint Server solution. The physical architecture is typically described in two ways: by its size and by its topology. Size, which can be measured in several ways, such as the number of users or the number of documents, is used to categorize a farm as small, medium, or large. Topology uses the idea of tiers or server groups to define a logical arrangement of farm servers.

Size

Size uses the number of users and number of content items as a fundamental measure to indicate whether a server farm is small, medium, and large, as follows:
  • A small server farm typically consists of at least two Web servers and a database server. One of the Web servers hosts the Central Administration site and the other handles additional farm-related tasks, such as serving content to users.

    The small farm can be scaled out to three tiers using a dedicated application server in response to the number of users, the number of content items, and the number of services that are required.

  • A medium server farm typically consists of two or more Web servers, two application servers, and more than one database servers. We recommend that you start with the preceding configuration and then scale out to accommodate the workload placed on the servers.

    In scenarios where services are known to use a disproportionate amount of resources, you can scale out the application tier. Performance data will indicate which services you should consider off-loading to a dedicated server.

  • A large server farm can be the logical result of scaling out a medium farm to meet capacity and performance requirements or by design before a SharePoint Server solution is implemented. A three-tier topology environment typically uses dedicated servers on all the tiers. Additionally, these servers are often grouped according to their role in the farm. For example, all client-related services can be grouped onto one or two servers and then scaled out by adding servers to this group as needed in response to user demand for these services.

    Ee667264.note(en-us,office.14).gifNote:
    The recommendation for scaling out a farm is to group services or databases with similar performance characteristics onto dedicated servers and then scale out the servers as a group. In large environments, the specific groups that evolve for a farm depend on the specific demands for each service in a farm.
For specific numbers related to small, medium, and large farms, see Performance and capacity management (SharePoint Server 2010).

Topology

Topology uses tiers as a model for logically arranging farm servers according to the components that they host or their roles in a server farm. A SharePoint Server farm is deployed on one, two, or three tiers, as follows:
  • In a single-tier deployment, SharePoint Server and the database server are installed on one computer.

  • In a two-tier deployment, SharePoint Server components and the database are installed on separate servers. This kind of deployment maps to what is called a small farm. The front-end Web servers are on the first tier and the database server is located on the second tier. In the computer industry, the first tier is known as the Web tier. The database server is known as the database tier or database back-end.

  • In a three-tier deployment, the front-end Web servers are on the first tier, the application servers are on the second tier, which is known as the application tier, and the database server is located on the third tier. A three-tier deployment is used for medium and large farms.

Installation and configuration

After you finish planning your SharePoint Server solution you can create a SharePoint Server farm to host the solution. The first step is to install SharePoint Server 2010 and create the farm that is required for the solution. The process of preparing your environment consists of the following phases:
  1. Prepare the servers

  2. Create the farm

  3. Configure settings, services, solutions, and sites

Ee667264.note(en-us,office.14).gifNote:
The farm that you create and deploy will undergo significant changes in size, topology, and complexity as you move through the different deployment stages illustrated in the SharePoint 2010 Products Deployment model. This is typical and the expected result of a phased deployment. This is why we recommend that you follow all of the stages described in the "Deployment stages" section of this article.

Prepare the servers

In this phase, you get your servers ready to host the product. This includes the supporting servers and the servers that will have SharePoint Server installed. The following servers must be configured to support and host a farm:

Create the farm

In this phase, you install the product and configure each server to support its role in the farm. You also create the configuration database and the SharePoint Central Administration Web site. The following servers are required for a SharePoint Server farm:
  • Database server: Unless you plan to use DBA-created databases, the configuration database, content database, and other required databases are created when you run the SharePoint Products Configuration Wizard.

  • Application server: After you prepare the application server, install any additional components that are required to support functions such as Information Rights Management (IRM) and decision support. Install SharePoint Server on the server that will host SharePoint Central Administration Web site and then run the SharePoint Products Configuration Wizard to create and configure the farm.

  • Front-end Web server: Install SharePoint Server on each Web server, install language packs, and then run the SharePoint Products Configuration Wizard to add the Web servers to the farm.

    Ee667264.note(en-us,office.14).gifNote:
    After you add and configure all the front-end Web servers, you can add any additional application servers that are part of your topology design to the farm.
For more information about supported deployment scenarios, see Deployment scenarios (SharePoint Server 2010).

Configure settings, services, solutions, and sites

In this phase, you prepare the farm to host your site content by completing the following tasks:
Ee667264.note(en-us,office.14).gifNote:
Farm configuration steps are not isolated to a specific tier in the server infrastructure.

Deployment stages

By deploying a SharePoint Server 2010 solution in stages, you gain the benefits that are provided by a systematic approach, such as collecting performance and usage data that you can use to evaluate your solution. Additional benefits include verifying your capacity management assumptions and identifying issues before the farm is put into production.
We recommend that you deploy your farm in the following stages:
  • Planning

  • Development

  • Proof of concept (POC)

  • Pilot

  • User acceptance test (UAT)

  • Production

Planning

Before you can deploy a farm, you must plan the solution that you want to deploy and determine the infrastructure requirements, such as server resources and farm topology. When you finish the planning stage, you should have documented the following:
  • An infrastructure design to support your solution

  • A detailed description of how you will implement the farm and the solution

  • A plan for testing and validating the solution

  • A site and solution architecture

  • An understanding of the monitoring and sustained engineering requirements to support the solution

  • A record of how the solution will be governed

  • An understanding of how the solution will be messaged to the user to drive adoption of the solution

We recommend that you use the planning resources and articles described in Planning and architecture for SharePoint Server 2010.
Ee667264.Important(en-us,office.14).gifImportant:
Resource and time issues may pressure you to be less rigorous during the planning stage. We recommend that you try to be as diligent as possible because missed or lightly touched planning elements can resurface as significant issues after you are in production. These issues can create much additional work, consume unbudgeted resources, and potentially take away from the success of your SharePoint Server.
After the planning stage, you move through the following deployment stages, updating and revising your plans, configurations, and topologies as you test.

Development

During the development stage you will deploy SharePoint Server on a single server or on multiple servers to develop, test, evaluate, and refine the solution that you intend to implement. This environment is scaled according to your needs during solution development and can be retained as a scaled down environment for future development and testing. This is not a stable environment and there are no service-level agreements.

Proof of concept (POC)

During the proof of concept stage, the objective is two-fold: to understand SharePoint Server and to evaluate SharePoint Server in the context of how it can address your business needs. The first level of product evaluation can be done by installing all of the product components on a single server. You do a more extensive product evaluation by a proof-of-concept deployment.
A proof-of-concept deployment on a single server or on a small farm enables you to expand the scope of your evaluation. In this deployment, non-IT staff is added to the evaluation team, which provides a broader view of how SharePoint Server features might be actually be used in the organization. The benefit of a proof-of-concept deployment is that you can collect data that can be used to refine your original plan. This data—such as page views, user behavior patterns, and server resource consumption—also enables you to start to build a benchmark for sizing your farm. A proof of concept is also good when you evaluate service applications and determining what feature sets that you will offer your end users.
It is important during the proof-of-concept stage that you understand the unique characteristics and functionality of these features because this understanding will help you define your overall topology. Be aware that a proof-of-concept deployment requires additional resources and extends the time required to put SharePoint Server into production.
Ee667264.Tip(en-us,office.14).gifTip:
Virtualization provides a good platform for evaluating SharePoint Server because a virtual environment provides flexibility, rapid deployment capability, and the ability to roll back virtual machines to previous states.

Pilot

A pilot is used to test your solution on a small scale. There are two approaches to using a pilot deployment. In the first approach, the focus is on functional testing without using real data. By using the second approach you test for production characteristics by using real data and have your pilot users test different kinds of tasks. We recommend the second approach because of the broader scope and real-world data that you can collect and use to refine your solution design.
A pilot deployment provides many benefits. It enables you to collect data that you can use to validate the following aspects of your farm design:
  • Infrastructure design

  • Capacity management assumptions

  • Site and solution architecture

  • Solution usage assumptions

The pilot stage also enables you to determine additional data that should be collected to increase the breadth and depth of your benchmarks. This is important if you want to assess the potential effect of additional features or services that you want to add to the farm before the user acceptance test.
At the conclusion of the pilot deployment, you can use the data that you collect to adjust the various components of the solution and its supporting infrastructure.

User acceptance test (UAT)

A user acceptance test deployment—also known as a pre-production environment—is used by organizations as a transitional step from the pilot deployment to a production deployment. An organization's business processes determine the scope, scale, and duration of user accept testing.
The topology of the pre-production environment should be the same as, or very similar to the planned production topology. During user acceptance testing, the SharePoint Server solution is tested against a subset or a complete copy of production data. This deployment stage provides a final opportunity for performance tuning and validating operational procedures such as backups and restores.

Production

The final stage is rolling your farm into a production environment. At this stage, you will have incorporated the necessary solution and infrastructure adjustments that were identified during the user acceptance test stage.
Putting the farm into production requires you to complete the following tasks:
  • Deploy the farm.

  • Deploy the solution.

  • Implement the operations plan.

  • If required, deploy additional environments such as authoring and staging farms, and services farms.

Friday, August 27, 2010

Validating special column types in SharePoint 2010?

How to validate special column types, e.g. phone, e-mail etc in SharePoint 2010?

Basic SharePoint 2010 field validation
One could use an ASP.NET RegularExpressionValidator but surely there must be a simpler way? There isn't really an easier way. Alternative ways might exist though.

If we want to compare values of one column to another or if you want very basic validation you can use Column Validation, but it doesn't support regular expressions so it won't help with things like email.
You could use jQuery to do the validation, which is a bit easier than using a validator, although it only checks on the client side.

Another option if you have the Enterprise version of SharePoint is to use InfoPath to edit the list. With InfoPath you can easily add regex validation.


Saturday, August 07, 2010

SharePoint WebService & JQuery - A tip to remember when calling custom web services in SharePoint from JavaScript (or jQuery)


When customizing rendering templates a wide variety of scripting technologies such as JavaScript, jQuery, and SPServices can be used.

One requirement that pops up from time to time are all of these rendering templates which need  to call a custom web service to populate a drop down list.  This is relatively easy to do and there are plenty of resources out there on how to deploy web services with SharePoint.

It's worth making a point to talk about this issue since a lot of people are asking about it on forums.  The issue is that you build and test your pages and they work great as an administrator. However, once an end user tries the page, the script on the page doesn’t work. 

With any scripting issue, you can bust out FireBug in Firefox and take a look at the page.  It shows the web service call which works great for the administrator but when the user tries it, the result is 403 forbidden.

Obviously, we need to grant permissions, but where?  Since the end user is on the SharePoint site, the identity that the JavaScript is calling with is that of the user.  This of course assumes, you are using NTLM or Kerberos and not doing forms authentication. 

The place we have to grant permissions may not make sense to you at all, but the general consensus is that you grant Read permission to the Authenticated Users group on the bin folder of your web application.  This is the case at least when you are deploying your code to the bin folder (and using Code Access Security).  I don’t believe that web services with binaries deployed to the GAC should have this issue but I could be wrong.  Here is what the permissions look like on your bin folder.


Any how, I hope this helps should you run into this issue.  I don’t foresee any potential security issues by granting this group access to the bin folder, but if you think there are any associated risks, I would like to hear about them.